
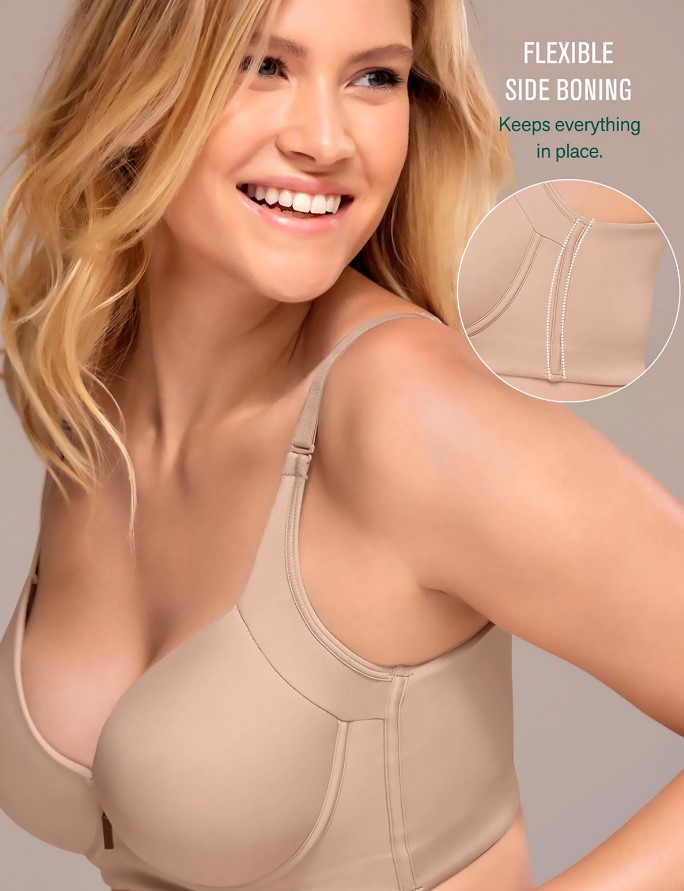
SIDE BONING SECRETS
Enhancing Bra Support: The Art of Side Boning for Intimate Apparel Start-ups
For entrepreneurs and start-ups in the Intimate Apparel industry, understanding innovative techniques is essential to crafting exceptional undergarments. One such technique is “Side Boning,” a method that brings additional support to the bra band while maintaining a sleek and balanced appearance. In this article, we’ll delve into the art of side boning, its application, and the steps to seamlessly integrate it into your designs.
Understanding Side Boning
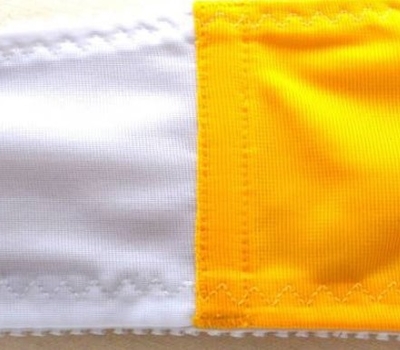
Side boning is a technique that involves adding supplementary support to the band of a bra. It contributes to a more comfortable and supportive fit. It’s a particularly useful technique for bras designed with a side seam. As it can provide a seamless, balanced appearance at the underarm while delivering the desired support to the band.
Step-by-Step Application
When it comes to implementing side boning, follow these steps to ensure a successful integration of this technique into your intimate apparel creations:
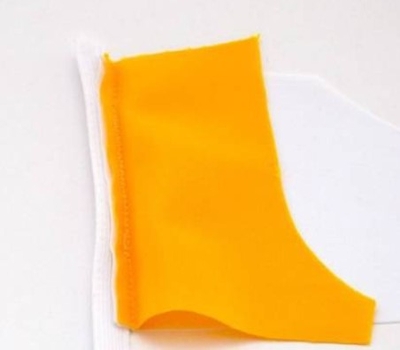
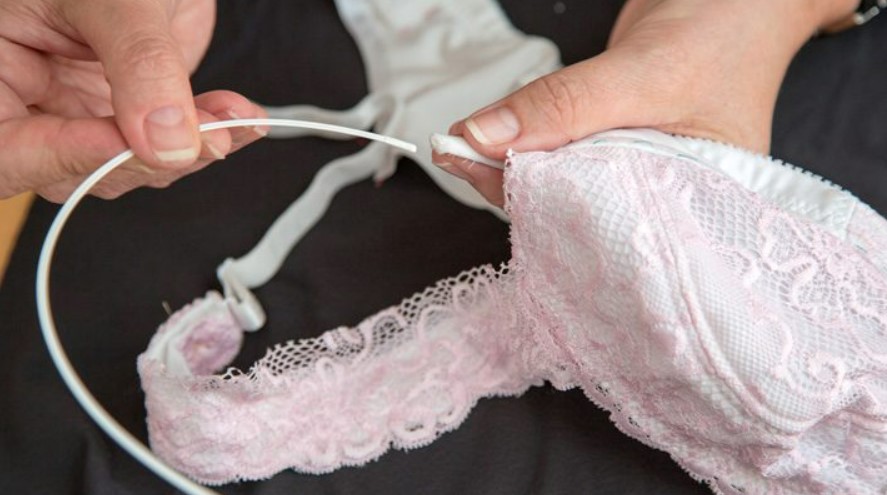
- Sewing the Side Seam: Begin by sewing the side seam of the bra. Ensure that no topstitching or trimming of the seam allowance is performed at this stage.
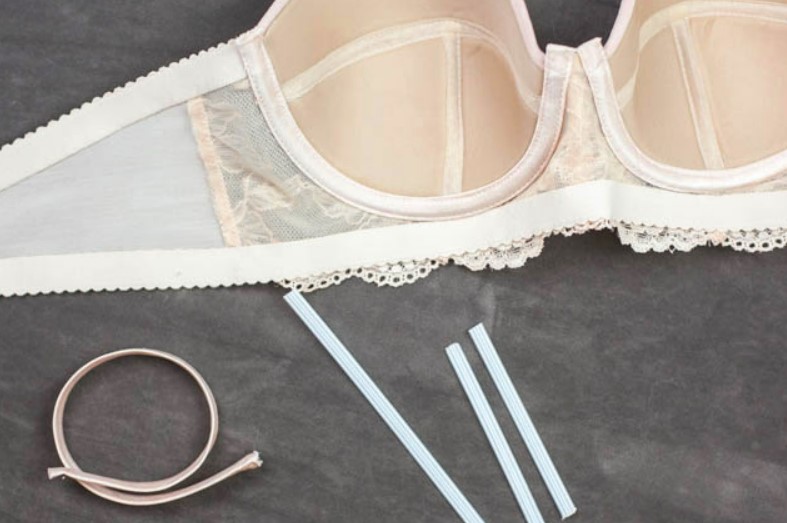
- Measuring and Cutting the Casing: Accurately measure the side seam of the bra and cut a piece of underwire or boning casing. Ensure it’s slightly longer than the measured length. This additional length, typically 1″ to 2″, facilitates easy manipulation of the casing while sewing elastics onto the band.
- Stitching the Casing: Switch to a Universal needle and increase the machine tension. Sew one side of the casing onto the band side of the side seam allowance using a straight stitch. Importantly, avoid stretching the casing as you sew it. Sew directly on top of the side seam line.
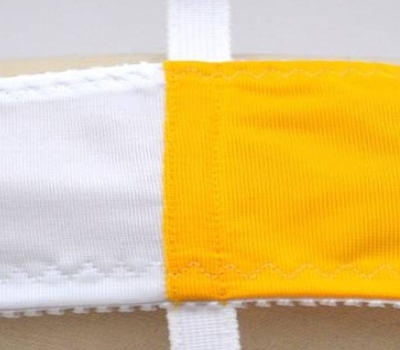
- Strategic Stopping Points: Pause your stitching at points equivalent to twice the length of the band elastic from the edge of the band. For example, if the band elastic measures ½”, halt the sewing 1″ from the bottom of the side seam.
- Continuing Construction: Proceed with the remaining steps of bra construction, moving the boning casing aside as you attach elastics to the band. Note that you will not topstitch or seal the casing until just before inserting the underwires.
- Finalizing the Casing: When ready, begin topstitching through the bra and casing from the right side of the frame. Using a Universal needle and increased tension, create two lines of stitching. One along the side seam and another catching the opposite edge of the boning casing underneath. These lines should run from the top to the bottom of the band.
- Sealing and Trimming: Seal one side of the boning casing by sewing a bar tack through all layers – the frame, elastic, and casing. Trim excess casing from the sealed side.
- Measuring and Inserting Boning: Determine the necessary length of boning, accounting for movement within the casing. Insert the boning, ensuring it extends from the previously sealed side to the point where the casing will be sealed on the opposite side. Keep a slight allowance for movement and sealing.
- Final Sealing and Finishing Touches: Secure the boning inside the casing with a bar tack through all layers. Trim excess casing. Upon completing the bra, treat the cut edges of the casing with Fray Check, allowing it to dry.
Integrating side boning into your bra designs, when appropriate, can offer the elevated support and comfort your start-up or entrepreneurial venture strives for. By following these detailed steps, you can master the art of side boning. Ultimately enhancing the structural integrity of your creations and setting the stage for the success of your brand in the dynamic landscape of intimate apparel.
Want to know more. Check our blog post on ‘Fit Alteration Techniques’ by clicking here.