
FIT MATTERS!
Testing Underwire Fit: How to Nail the Perfect Fit for Your Lingerie Line
Hey there, fellow entrepreneurs in the world of intimate apparel! We know you’re all about making bras, panties, and lingerie that feel like a dream. But have you ever thought about how important it is for those underwires to fit just right? That’s what we’re diving into today – testing underwire fit for your intimate apparel start-up!
LET’S GET THE BASICS RIGHT
An underwire that fits perfectly should sit snugly under the breasts and lie flat against the body. Therefore, it should comfortably contain the full diameter of the breast tissue without extending into the underarm area. At the center front of the bra, the wire should align with the edge of the breast where it meets the chest wall. Achieving this perfect fit requires that the underwire matches the diameter of the breasts precisely.
THE TESTING PROCESS
Now, let’s go through the step-by-step process of testing underwire fit:
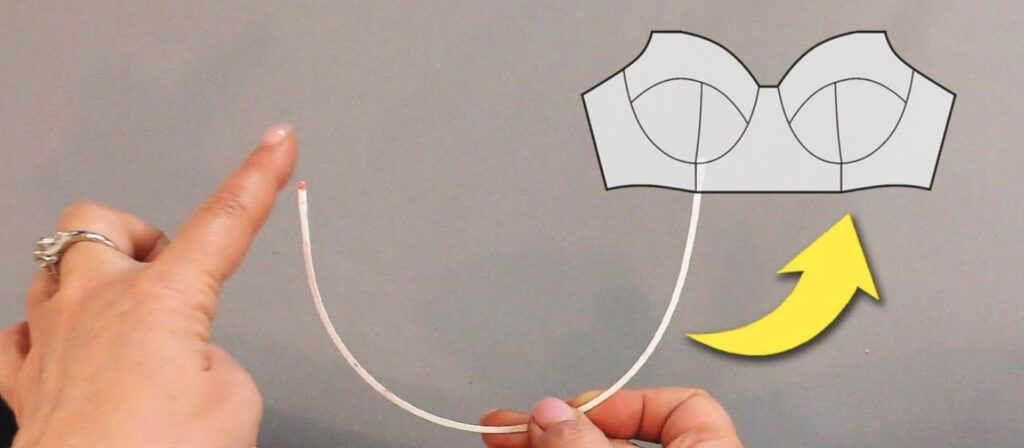
- Prepare to Test: Begin by lifting up the breast and positioning the wire around the base of the breast, where it meets the chest wall. The colored tip of the wire should align with the center front. If you’re attempting this solo, it might be a bit tricky, but it’s doable – just make sure you have a mirror handy.
- Movement: With the wire in place, raise your arm up and then lower it. This simulates the movements your customers will make while wearing your product.
- Evaluate the Fit: Now, judge the fit of the underwire. Look for the following signs to determine if the wire is too small:
- The wire cannot remain flat against the body.
- The wire pokes into the breast.
- The wire cannot fit comfortably around the breast.
On the other hand, signs that the wire is too large include:
- The wire extends past the edge of the breast where it meets the chest wall at the center front.
- The wire extends past the breast tissue and into the underarm area.
- The wire drops below the bottom of the breast onto the chest.
- Repeat the Process: Keep in mind that the underwire may splay out a bit toward the underarm once it is in the final bra. This means it’s okay if the wire is in contact with breast tissue under the arm. If the wire does not fit, repeat the process with different sizes until you find the perfect fit.
- Consider Breast Asymmetry: Repeat this fitting process for each breast, as they may have different sizes and shapes.
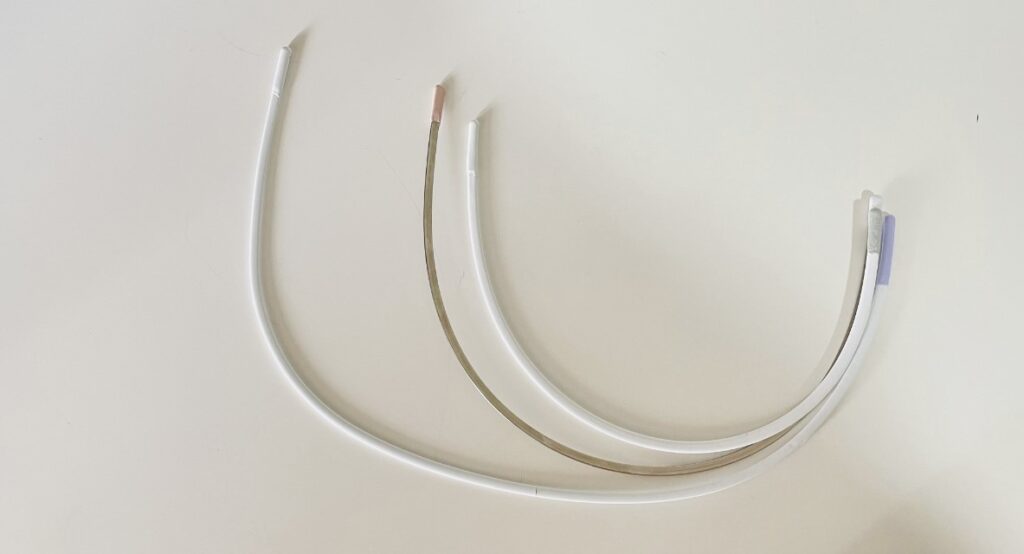
- Selecting the Right Underwire: If the wire you removed from your bra fails the fit test, it’s time to explore other sizes. Get one to two wire sizes above and below the one you traced to have a variety to try on. If it seems too small, order some larger sizes, and if it seems too large, order some smaller ones. The key is to have a sampling of sizes to pinpoint the perfect fit.
- Final Fit Test: Once you have a selection of underwires, run through the testing process again to find the best fit.
PRO TIP: REUSING UNDERWIRES
Before you discard any worn-out bras, consider harvesting the hardware. Underwires that still maintain their shape (if they fit you) and undamaged rings and sliders from the straps can be reused in a new bra, reducing waste and costs.
Testing underwire fit is certainly a critical step in creating beloved intimate wear. By following these steps and considering the fit intricacies, you can guarantee customer comfort and contentment. Remember that achieving the perfect underwire fit is a journey of trial and error, so don’t be afraid to experiment with different sizes until you find the ideal fit for your products. And don’t miss our blog posts on:
- Bra Wire Engineering: Finding the Perfect Fit for Your Bra with Science and Style
- Bra Wire Grading for Intimate Apparel Entrepreneurs and Start-Ups
- Mastering Technical Bra Fitting for Perfect Fit
Happy designing in the world of intimate apparel!