
MASTERING THE ART OF FIT
The Basics of Pattern Drafting: A Fundamental Skill for Intimate Apparel
Whether you’re starting a new business or seeking to expand skills with intimate apparel, mastering pattern drafting is fundamental for creating well-fitting and stylish garments. It involves creating a template or pattern from scratch, based on size requirements, which serves as the blueprint for cutting and sewing the final garment. In this article, we will explore the basics of pattern drafting, including the process, tools, and tips for achieving accurate and well-shaped patterns.
UNDERSTANDING THE PATTERN DRAFTING PROCESS
Pattern drafting involves several stages and requires precise techniques to follow. Here is a step-by-step overview of the pattern drafting process:
- Sketching and Measuring: The pattern drafting process begins with a sketch or photograph of the desired garment. The next step is to measure a form or individual to create a size chart.
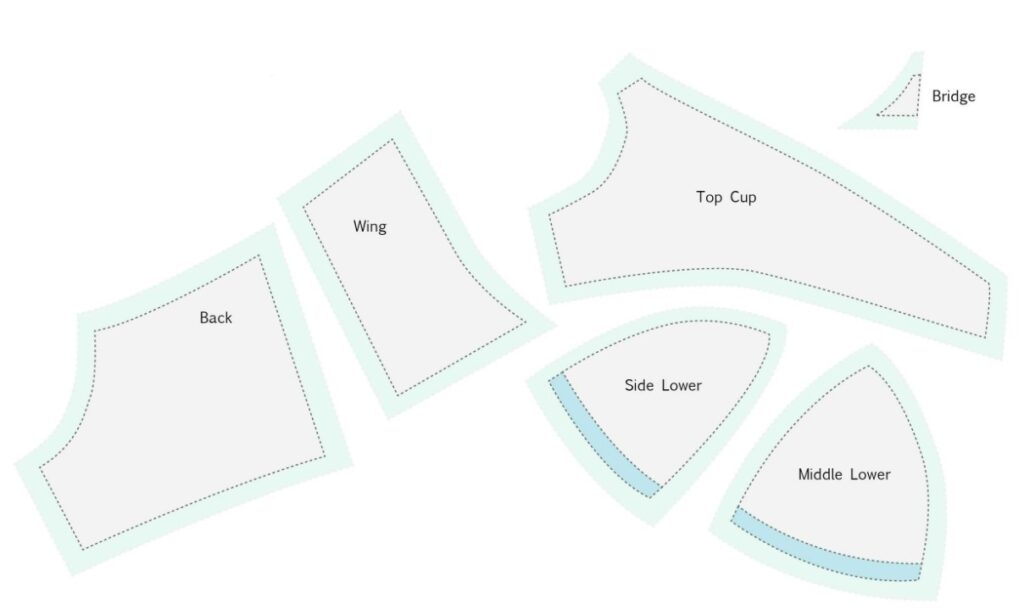
- Creating the Block or Sloper: Trained pattern makers create an initial pattern draft, known as a block or sloper, using the size chart. This draft serves as the foundation for all subsequent iterations of the garment.
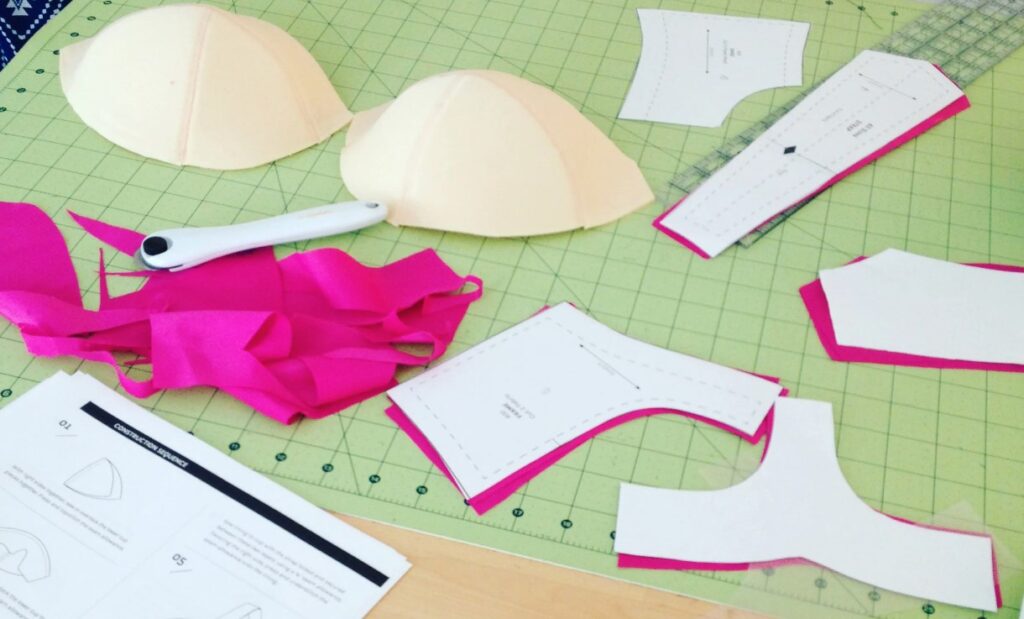
- Making a Mock-up: Fabric is cut from the block to form a mock-up, also known as a muslin or toile. These test pieces allow for sampling and adjustment of the pattern template.
- Grading the Pattern: After the sample garment is approved, the grading process begins, which involves transferring the perfected pattern to smaller and larger sizes to accommodate different body shapes.
- Computerized Drafting: While student drafters are initially taught hand drafting, computerized pattern drafting applications are incorporated as studies progress to help students learn how industrial or mass-produced patterns are created.
ESSENTIAL TOOLS FOR PATTERN DRAFTING
To create accurate and well-shaped patterns, you will need the following tools:
- Pattern Master: A specialised ruler with measurements and curves for drafting patterns accurately.
- French Curve: A curved ruler used to add curves and shape to the pattern.
- Bendy Ruler: A flexible ruler used for measuring and marking curved lines.
- Pattern Notchers: Tools used for marking notches on the pattern for aligning pattern pieces during sewing.
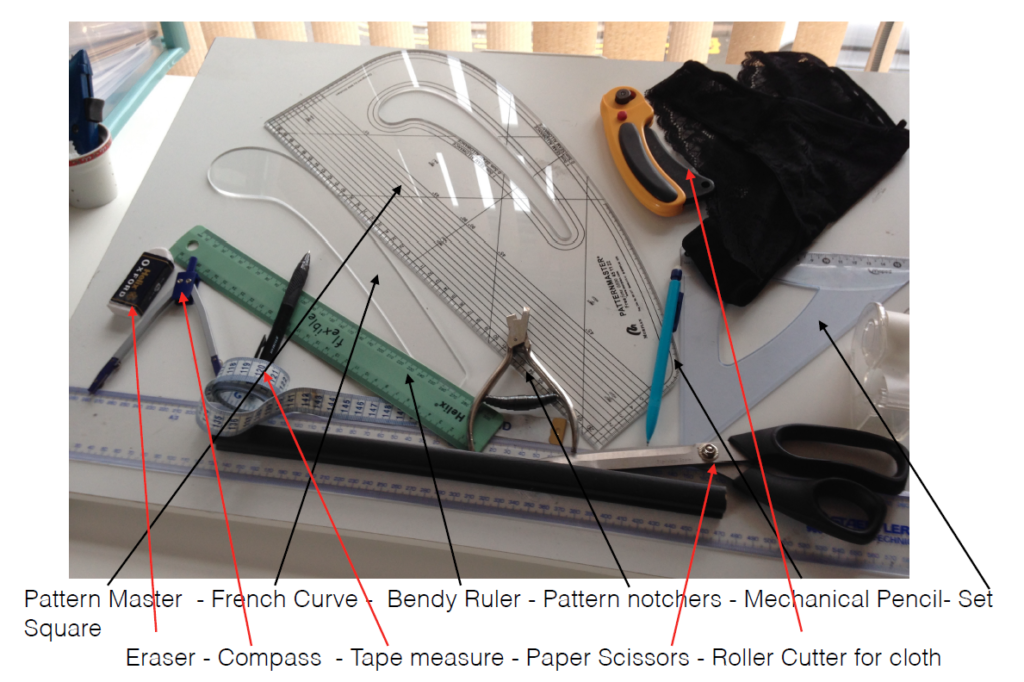
- Mechanical Pencil: A precise pencil for marking measurements and lines on the pattern.
- Set Square: A right-angled ruler used for creating perpendicular lines and angles.
- Eraser: A tool for correcting mistakes or adjusting lines on the pattern.
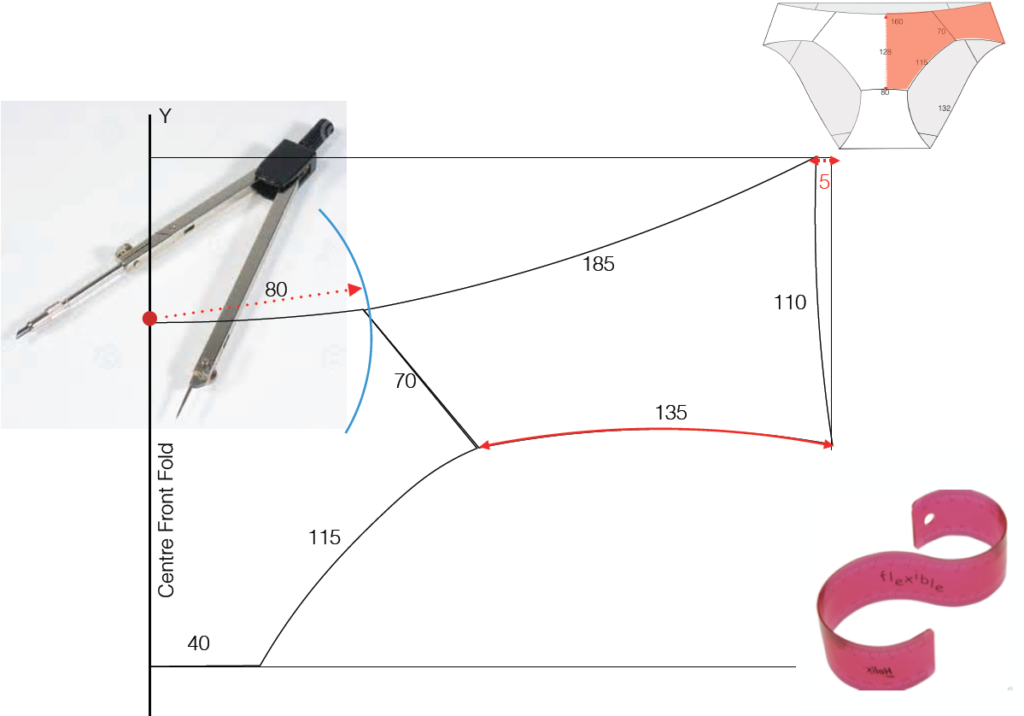
- Compass: Used for measuring and marking distances, especially for circular or curved shapes.
- Tape Measure: A flexible measuring tool used for taking body measurements and checking distances.
- Paper Scissors: Sharp scissors for cutting fabric and paper patterns accurately.
- Roller Cutter: A tool used for cutting fabric accurately and smoothly.
A GENERAL GUIDE TO DRAFTING PATTERNS
Before you start drafting patterns, it’s essential to practise the following exercises:
- Create an XY axis to base the construction on.
- Use a set square or pattern master to ensure the axis is at a right angle.
- Keep the basic construction lines light using a hard lead.
- Use a French curve to add curves to the draft.
- Use a compass to discover distances.
- Use a bendy ruler or tape measure to check and record curve lengths.
In the initial phase, it is recommended to draft patterns by hand and then transform them into CAD drawings using 3D software at a later stage. The accuracy of drafting in terms of guide seam lengths is important, but good pattern shape is always better. This means that achieving the seam lengths shown is essential, but drafting a great shape pattern is always better. So, we encourage you to trust your judgement and create patterns that suit your vision and aesthetic. Good luck on your pattern drafting journey!